When it comes to vulnerability and compliance scanning, Tenable has established themselves as the king of the hill. With their Nessus vulnerability scanner, you can automate and report on the security health of most devices in your environment. Recently, Tenable changed their policy to now allow their free version of Nessus (now renamed Nessus Essentials) to be used for commercial use. This is tremendous news for very small businesses. Likewise, it’s also great for those looking to become familiar with the gold standard of vulnerability scanners.
Below we are going to describe a basic way to set up a vulnerability scan in the Nessus Essentials scanner. The Nessus Essentials scanner will allow scanning of up to 16 IP addresses. In a normal operating environment there is a lot of tuning that would ordinarily go into the scan profiles that are used. This is normally done to minimize the impact on resources of the Nessus server and to also get a more complete scan. This post focuses on setting this up as a beginner user, and getting a solid first time scan. In future posts, we will dive more into optimization of Nessus scans for larger environments.
If there are no vulnerabilities you are not scanning hard enough!
We are going to walk through the high-level steps here. At this point, we are assuming you have already downloaded Nessus Essentials and have gone through the installation process. If not, go here to sign up and get a download code. Installation is very straight forward and directions can be found here for Windows, Linux, and OSX. Lastly, we are also assuming the latest plugins were automatically downloaded during the install process.
Start with Scan Profile
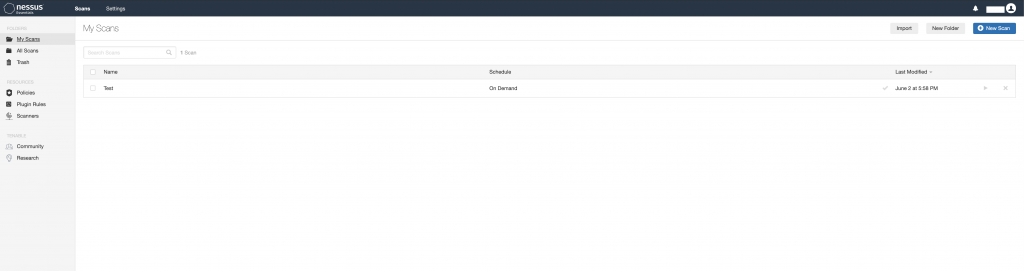
For the purpose of this blog, we are just going to scan a single Mac desktop running OSX. In order to do this, we need to first create a Scan Profile. A Scan Profile is a collections of saved settings used whenever you need to scan the same devices. This profile will consist of the type of scan you are performing, credentials/types of authentication, IP addresses of the devices you want to scan, and all of the various scan options you plan on using. To create a Scan Profile, click on the “Scans” button on the top right of the main page. From the My Scans page, select “New Scan” in the from the top right of the page.
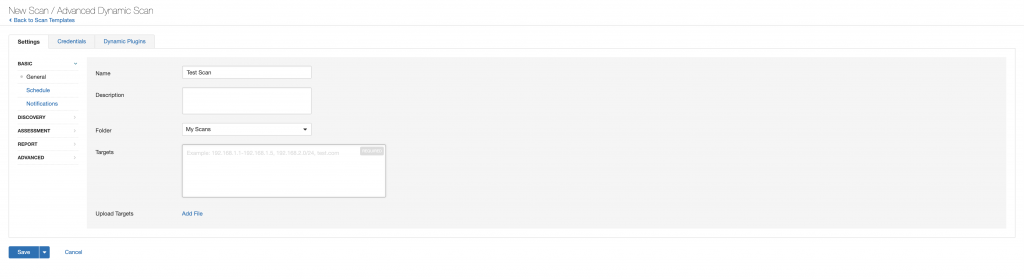
Nessus Advanced Dynamic Scan
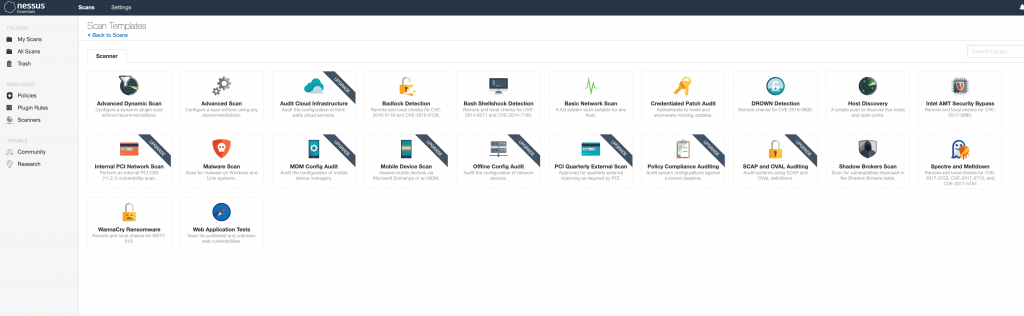
To start, you must select the type of scan you want to do. A good default scan to start with is the Basic Network Scan. However, in this blog I used the Advanced Dynamic Scan. This was done so I could show some of the additional options in the screen shots. Other scan options include Host Discovery, Web Application, and Malware Scans.
More Profile Options Than Match.com
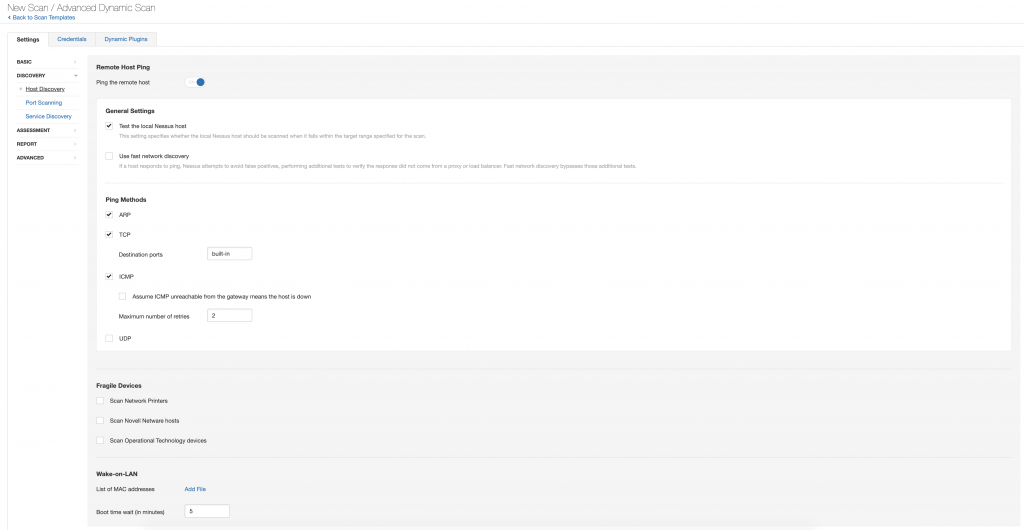
There are a multitude of Scan Profile settings that you can tweak depending on your environments. These include things such as:
- A list of items to be scanned (or avoid scanning)
- Throttling settings that might be necessary for your environment (concurrent plugins per device, number of devices scanned at once, etc.)
- IP addresses
- Ping/Discovery settings
- Port range settings (default is up to 1024)
- Assessment and report settings
For a general/simple scan, you can leave the settings as default and adjust after the first run as necessary. This is what we did with scanning the Mac. If Nessus scanning is new to you, I would recommend doing some testing first. Especially test this prior to using it during peak hours in a live environment.
Pick Your OS Poison (or Poisons)
Depending on what you are planning to scan, you have to make a decision on whether you want to do a credentialed or non-credentialed scan. A credentialed scan, as the name implies, requires valid credentials to authenticate to the device. This type of scan is much more thorough and is highly recommended. Any devices that you don’t have credentials for will be scanned as a non-credentialed scan. The main difference between the two is that a credentialed scan will be able to detect software/patches/registry settings. A non-credentialed scan will only be able to determine vulnerabilities based off of responses it receives from the open ports and information provided back from the services running on the device. There are other situations where a non-credentialed scan make sense (especially when doing some types of reconnaissance/penetration testing), but that is outside the scope of this article.
Another option for configuration is which plugins you want the scan to use. Again, in this case, go with the default off the bat. But in the future, you might only want to do a scan for certain family of plugins (Windows only), a specific vulnerability, or even look for a specific piece of malware. The plugin section allows you to customize this. Minimizing the plugins used in a scan obviously minimizes the time it takes and the CPU resources required to complete it.
Badges…We Don’t Need No Stinkin’ Badges (But…Here in Nessus You Do)
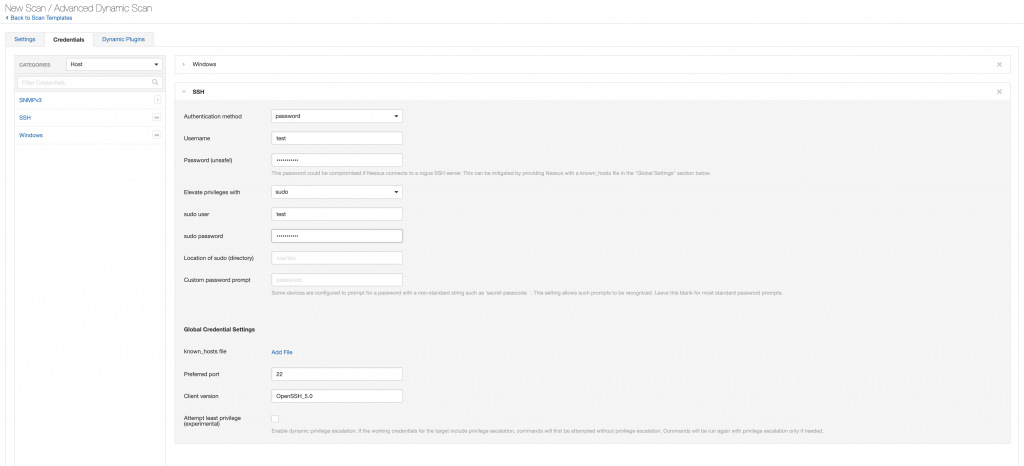
So, we have determined that we want to do an authenticated credentialed scan. The next step is to add in the proper credential types to the Scan Profile for the types of devices that are being scanned. The primary ones that would be used are SSH (for Linux/Unix/OSX/network devices) and Windows for…well….Windows devices ?. Below, we show the Windows and SSH configs, but for our Mac scanning example, we only need the SSH credentials. Be aware that depending on the type of device connecting to for SSH, you might need to add in Sudo, SU, Sudo + SU, or some other type of elevation privileges. Again, this is something that a first time user will need to test to ensure it is functioning properly.

Ready…Set…Scan!
We have our Scan Policy set up, stuck with the default settings, added in our IP range, and set up our credentials for the authenticated scan. At this point you can begin the scan by going back to the “My Scans” page where all the Scan Policies are shown, and clicking on the “Launch” button.
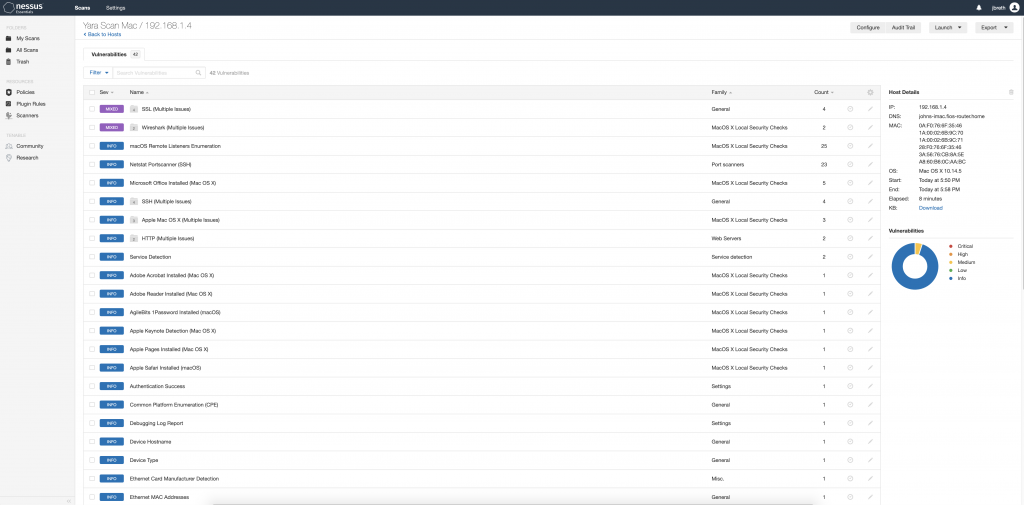
You Scan It, You Own It
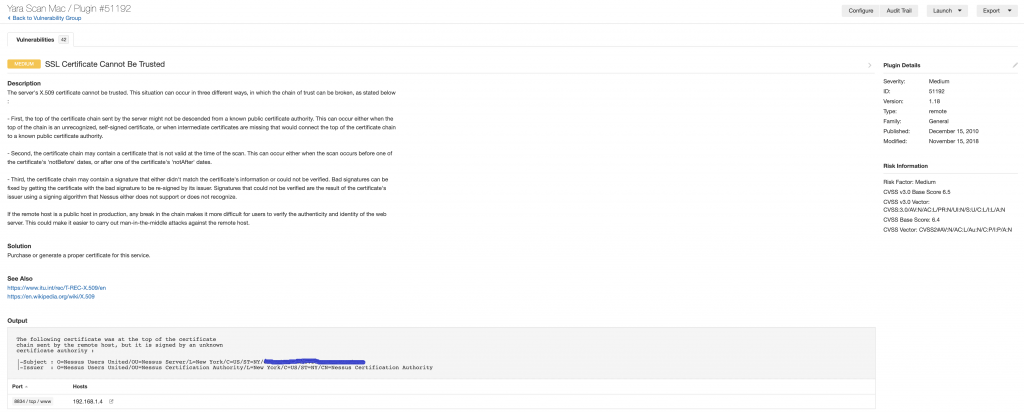
The results will be displayed once the scan is completed. They are categorized by Critical, High, Medium, Low, and Info. There are many schools of thought on the definitions and level of urgency on remediation of the various categories. There can be other mitigations and compensating controls in place that minimize the risk associated with each vulnerability- keep this in mind when determining a course of action for prioritization, especially in much larger environments.

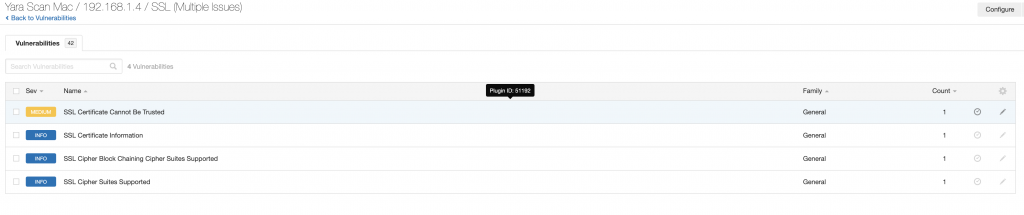
Each individual finding can be clicked on, which then takes you to a new page detailing the specifics of each finding. This will provide information on the vulnerability, how to fix it, and the specific output from the scan that shows how Nessus determined the vulnerability presence on the device.
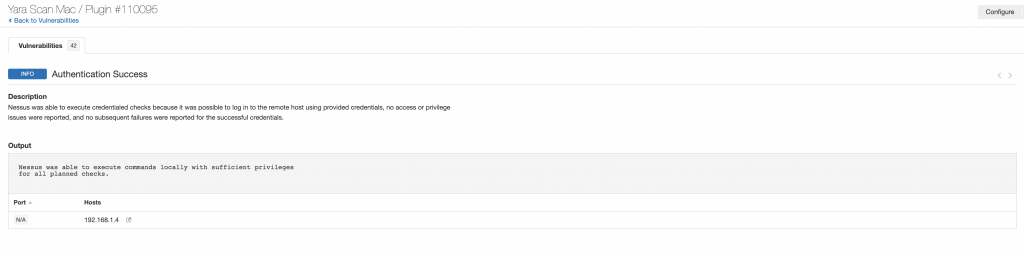
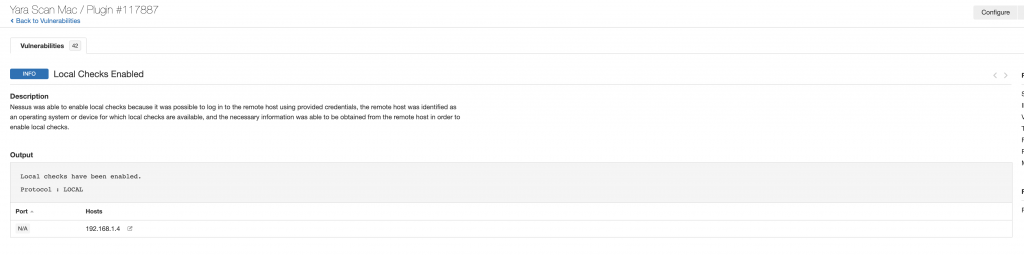
Two other findings that you will want to verify when doing credentials scans are that you were able to log in and that local checks were enabled. Below are the two Info findings that show these both happened successfully.
If you run into issues while attempting to scan, take a look at the following things:
- Make sure you have the proper credentials to log into the device. If it is failing, make sure you try to log into the device with the credentials via other means besides Nessus to isolate the problem.
- Ensure that all proper firewall rules or access control lists (ACL’s) are in place to allow the Nessus scanner to connect to the devices you are trying to scan.
- Lastly, ensure that whatever device you are running Nessus on is not blocking Nessus’ outbound connections. This traffic can often be stopped by end-point protection software (Anti-Virus,/HIDS).
The Wrap Up
Hopefully this blog gives you a little bit of an idea how to use Nessus Essentials (and really Nessus in general) to do vulnerability scanning. We would recommend downloading it and giving it a try, especially if you are not currently doing any vulnerability scanning in your environment. However, double check that you have the authority to do so before kicking off vulnerability scans. Tenable has a fantastic amount of resources in their community forums and we highly recommend heading over there to find further documentation on Nessus and additional configurations as you begin your journey.
References
Some great references on the Tenable Nessus product.
- https://community.tenable.com/s/
- https://www.tenable.com/plugins
- https://docs.tenable.com/nessus/Content/ScanAndPolicyTemplates.htm?Highlight=nessus%20policy
Find out more about J.B.C.’s Cyber&Sight™ blog here.