One thing I’ve noticed in the Infosec/Cyber community (and in the IT community as well, if we’re being completely honest) is a little bit of fear over truly understanding how to subnet. There are many methods out there and some of them work for some people, but everyone works/learns differently. I spent some time putting together two diagrams that I thought helped make it click from a visual perspective. I posted one on subnetting and folks seemed to really like it. I received a lot of comments after asking how you add larger subnets together (i.e. supernetting).
Below are the diagrams covering subnetting and supernetting, as well as links to YouTube videos where I break down the thought process behind the diagrams, aims to help demystify subnetting.
Subnetting
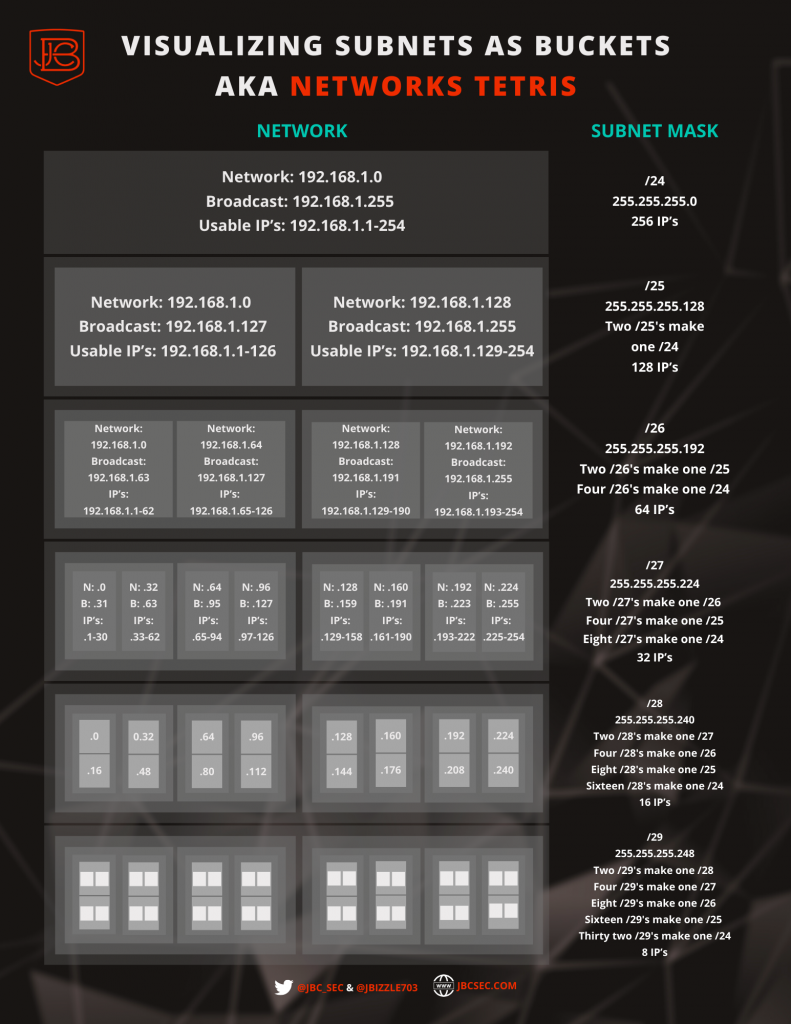
The thing that really clicked for me was understanding that each type of subnet (/24 for instance) is made up of multiple smaller subnets. And the address assignments or boundaries of these smaller subnets cannot change. You can’t make a /26 network that bridges two distinct /25’s. So, learning where these boundaries are is critical to learning how to subnet.
Another key point is we need to remember that the first IP address in a network is always the network address and the last one is the broadcast address. These are not usable IP’s. What we’re left with in between is the usable IP range for the subnet. In most instances, one of those usable ones will be assigned as the gateway for routing, and the rest will be used for whatever devices you want connected on that network. In looking at the above diagram, if we start with the /24 network of 192.168.1.0, we know that 192.168.0.0 and 192.168.0.255 can’t be used since they are the network and broadcast address. The rest of the IP’s are the usable IP Range.
If we need to create more than one network from the /24 (maybe we have different types of devices and want to break them up for security reasons), we can break the /24 into a two /25’s. Looking at the diagram and we can see where those boundaries start and stop for the /25’s. And if we need more than 2 networks, we could then take the /25’s and break each down into two /26’s (we would now have 4 /26 subnets).
One thing that might help make things click is realizing that for every step going to the right (going from a /24 to /25 to /26…etc), we are doubling our initial number of networks but halving our number of IP’s within each subnet, as they are now split between two networks. The inverse works for every step we got to the left (going from a /29 to /28 to /27 … etc.), as we are dividing the total number of usable networks we have by 2. So if we take two /29’s and they fall within the IP space (the boundary) of a single /28, you could combine them into one /28 network.
To sum it up: it really is all about memorization of block sizes, and then dividing or multiplying by two when moving between subnet sizes, and remembering the first and last IP’s of a subnet cannot be used!
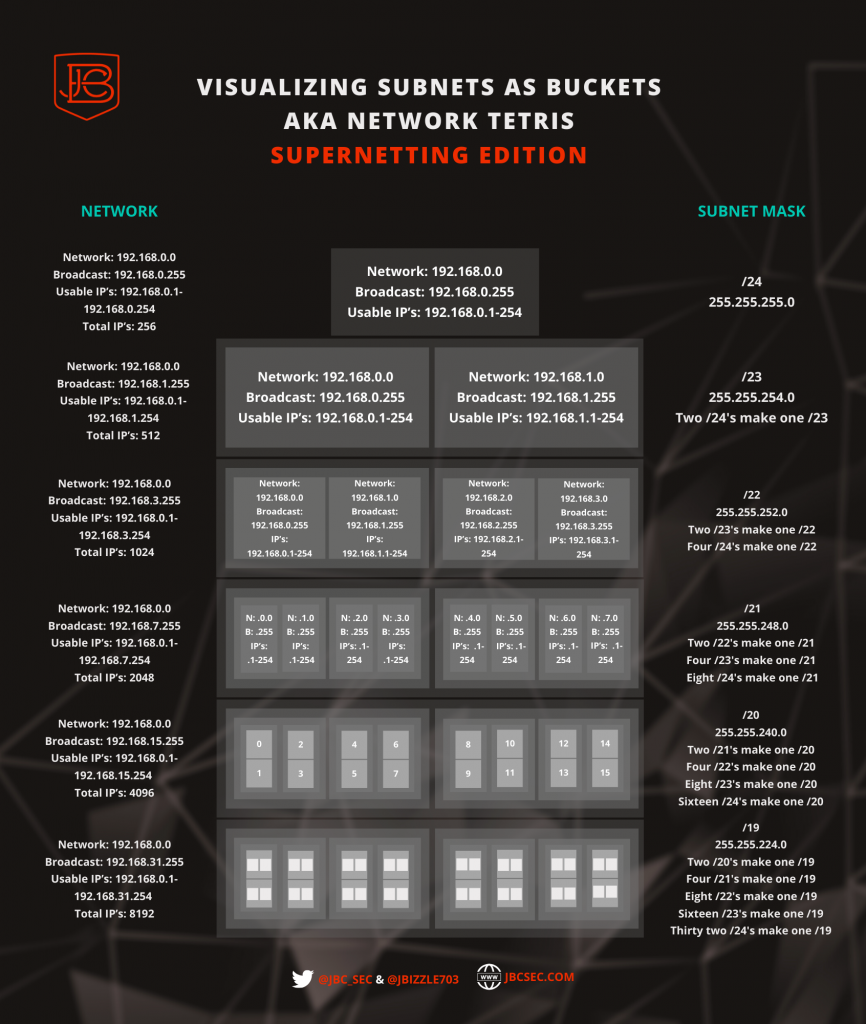
But what about when we want to combine much larger networks- what does that look like?
Supernetting
The same rules apply here as we discussed above. The part that becomes challenging is understanding the range boundaries as we move into larger subnets (larger than /24’s) and how to add them together. This is really only going to come with visualization and memorization.
Printer Friendly Diagrams
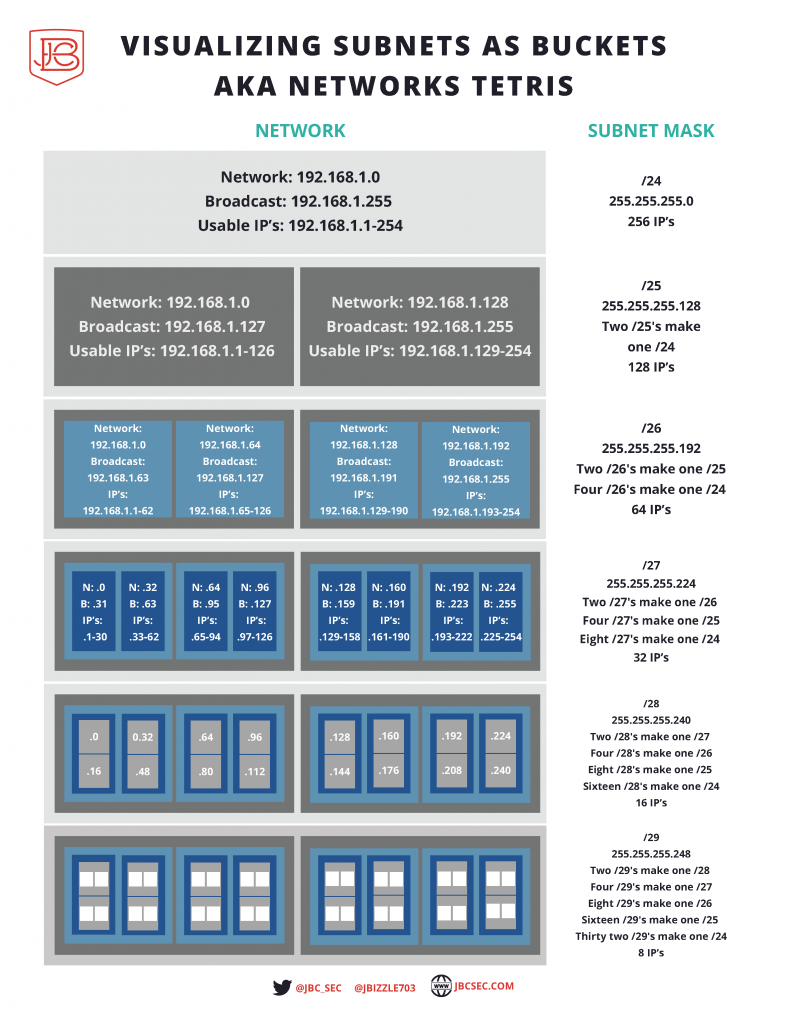
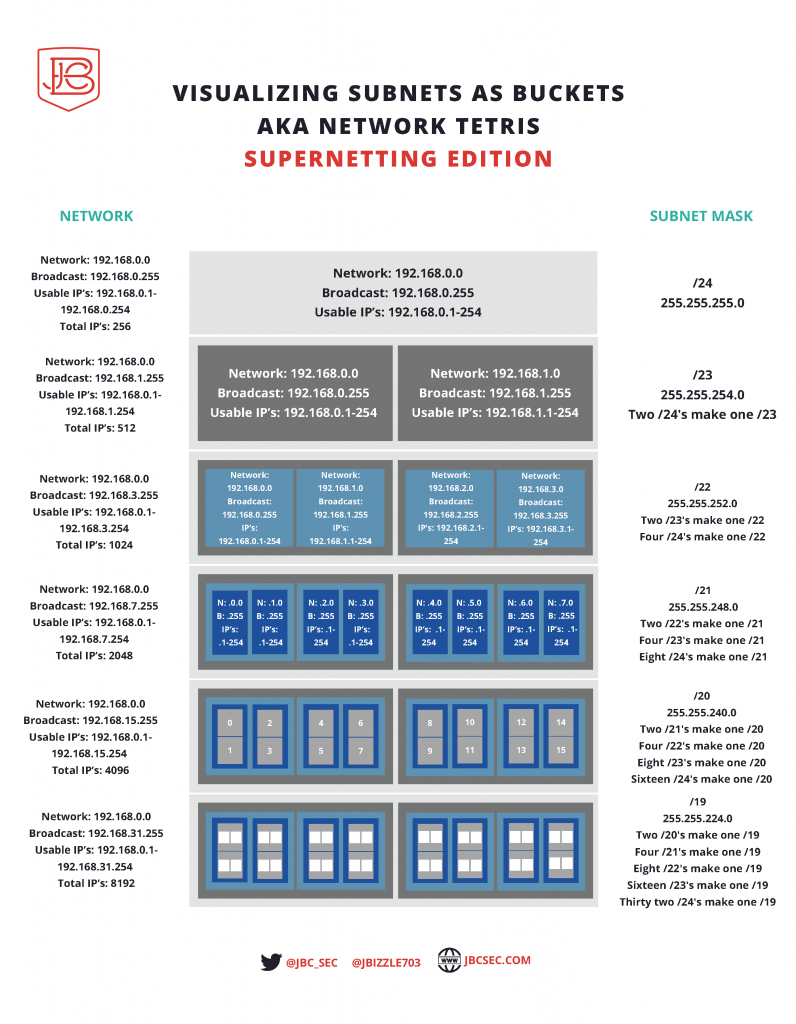
I had requests for printer friendly diagrams, so if you wish to print these out, the below versions might make your printer a bit happier than wasting all that dark ink!
The Wrap Up
I hope the above diagrams and YouTube videos are helpful. If you have any questions or comments please leave them on the YouTube videos and I’ll be happy to get back with you. I’ll be covering a few other topics aligned with this shortly, such as binary conversion of IP and Subnet address, and IP V6 address structure, so be on the lookout for those!


